How do I create consistent product photos for a fashion brand with hundreds of SKUs?
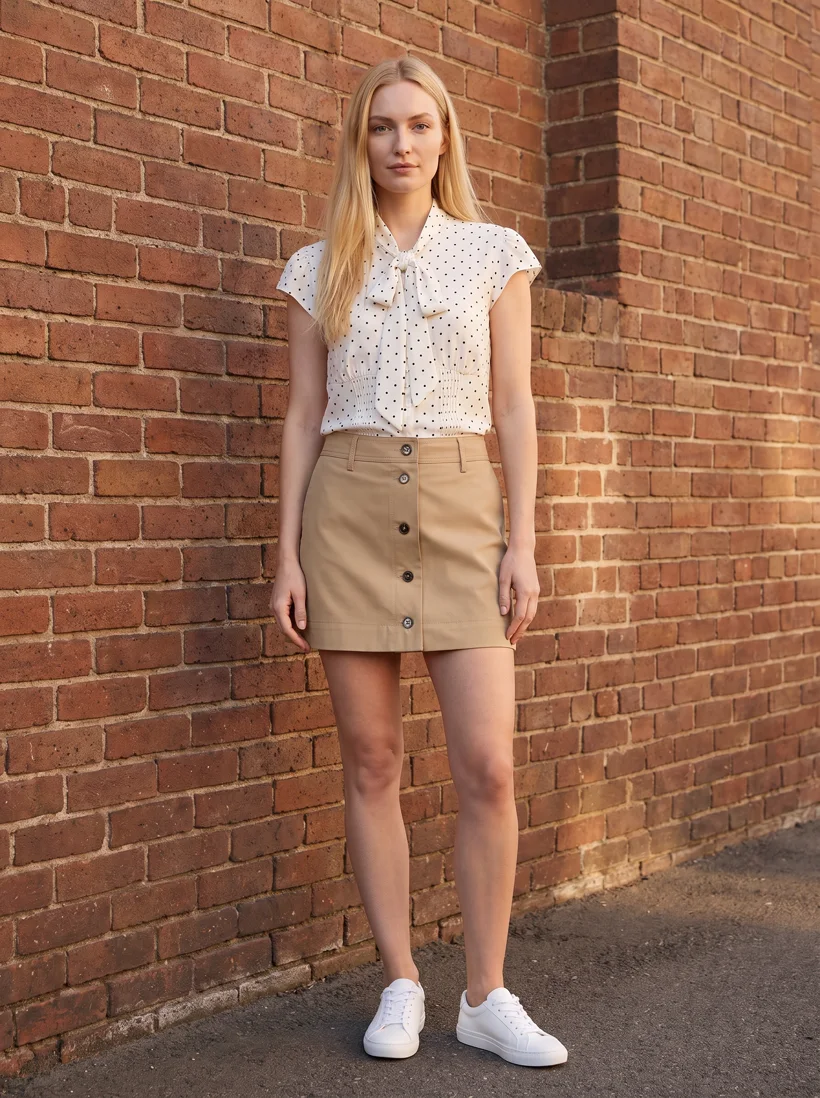
Save the three things that make product photos look alike, then reuse them for every garment: the model, the art direction (the location, the light, the framing, the pose family), and the crop. On Uwear those are saved assets, so the photo for SKU 400 is generated from the same saved face, the same set and the same camera as SKU 1, without anyone re-describing them. An automatic reviewer compares each result with the product photo and with the saved model, and retries the takes that drift.
Run it as garments are added, from the assistant you already use, and the set exists before the product page does. The three photos below are three different garments on one saved model in one saved art direction. The reviewer's verdict on every take is further down, including the two it rejected.
Why do product photos drift across a range in the first place?
Because each photo is made by a different day. A studio range is shot over months of bookings, each with its own light, model availability and retoucher. A single-prompt AI tool has the same problem in miniature: each garment gets a new description of the model and the scene, and the description drifts. Consistency does not come from prompting harder. It comes from not re-describing the things that should not change.
What do you save once and reuse for every garment?
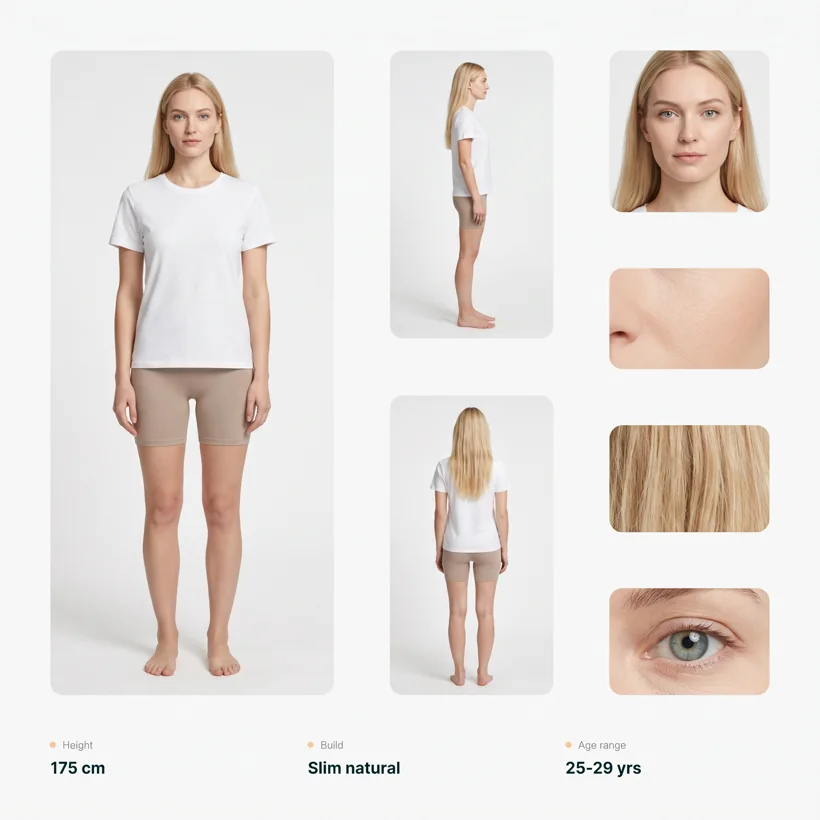
- -The model. Create one from a description or from reference photos, save it, and reuse it. Face, body and styling carry into every generation. The AI fashion model generator covers how a saved model is made.
- -The art direction. A saved document that fixes the world of the shoot: for the series below, reddish brick walls, soft overcast city light, relaxed poses near the wall, full-body front framing. See art direction.
- -The location. Optional. A pinned background plate, such as the Pure White studio, when the range must sit on one exact backdrop. The art direction carries the scene when no plate is pinned.
- -The crop. A named camera per shot: full body front, upper body front, full body back, detail. The back and detail views are camera edits of the approved front, so they inherit its set and light.
What does a consistent series look like?
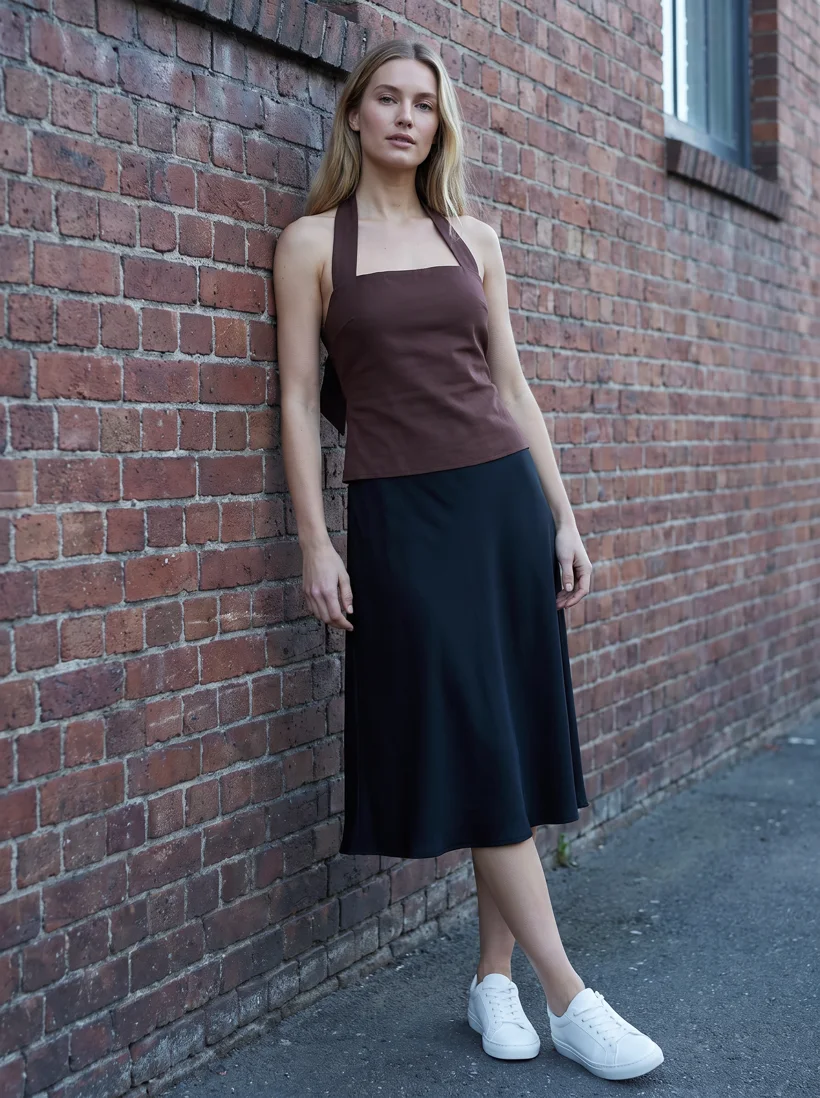
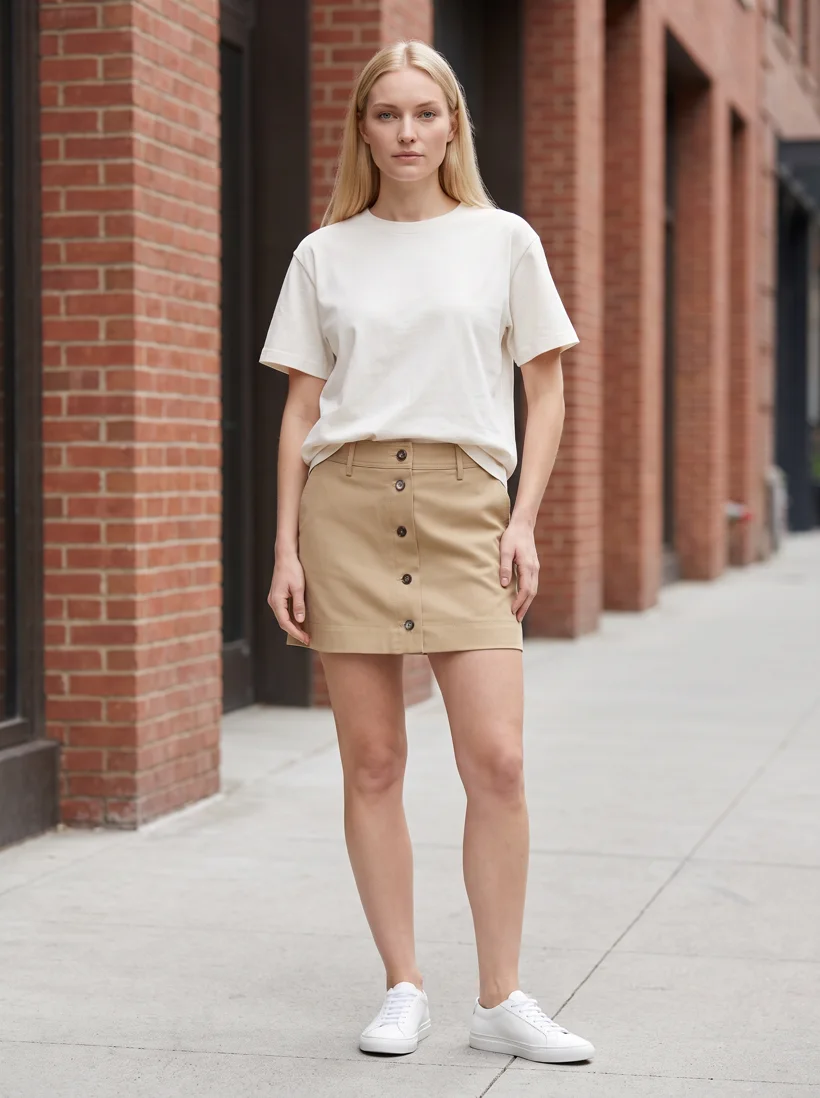
Three garments, one saved model, one saved art direction, one sentence of shot intent each. Generated with Gemini Pro at 2K; each photo cost 5 credits.
How does the reviewer catch the takes that drift?
Saving the inputs makes drift rare, not impossible. Two of the first three takes for this series drifted, in two different ways, and the reviewer caught both. It compares each result with the product photos and with the saved model, writes a verdict per criterion, and sends rejected takes back for a retry within the allowance you set.
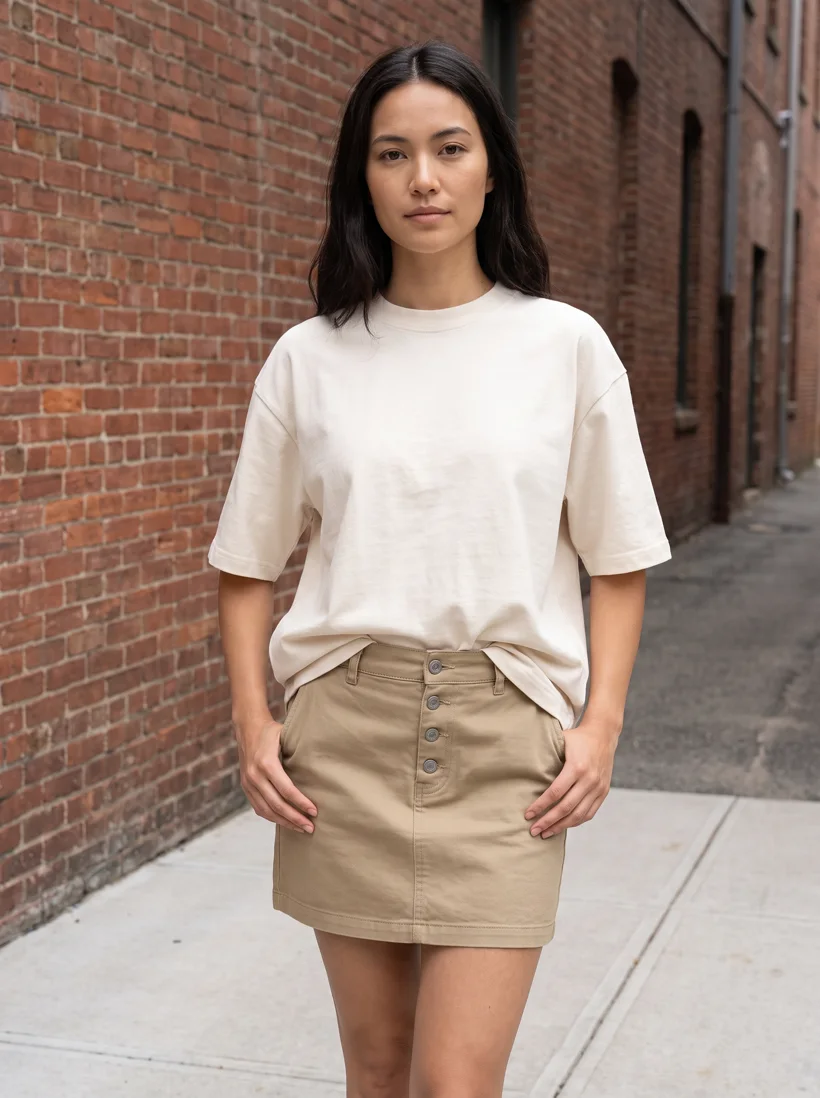
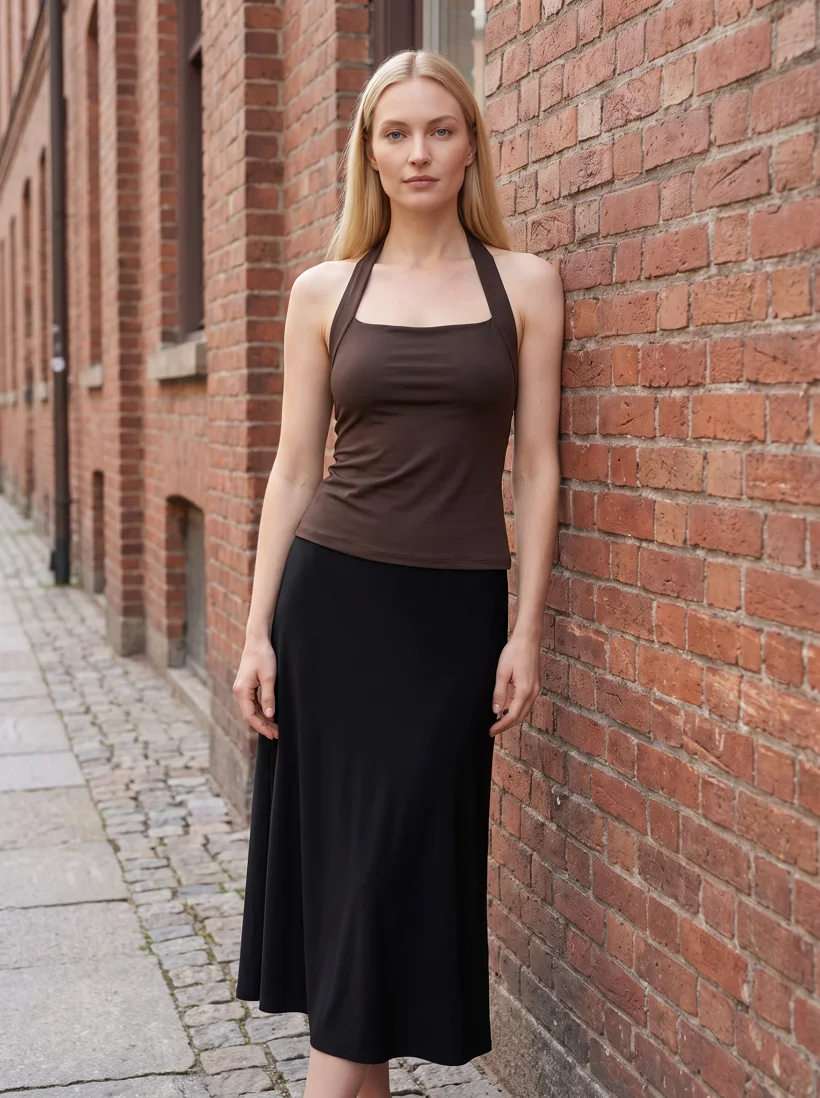
| Take | Garments | Verdict | Reviewer reason, quoted |
|---|---|---|---|
| Look 1, take 1 | Blouse and skirt | Not checked | Barefoot: the brief did not name shoes. Re-shot with sneakers named. |
| Look 1, take 2 | Blouse and skirt | Approved | "The generated model maintains high facial features, blonde hair color/style, eye color, and slim build consistency with the reference avatar image." |
| Look 2, take 1 | Halter top and skirt | Rejected | "The clothing description explicitly defines the skirt as knee-length, but in the generated image it is an ankle-length maxi skirt." |
| Look 2, take 2 | Halter top and skirt | Approved | "The skirt falls right around/below the knee, accurately matching the knee-length specification and reference image." |
| Look 3, take 1 | Heavyweight tee and skirt | Rejected | "The person in the generated image has dark brown hair and different facial features, completely failing to match the blonde model in the input avatar reference image." |
| Look 3, take 2 | Heavyweight tee and skirt | Approved | "The avatar's facial features, hair color and style, skin tone, and slim natural body proportions are consistently preserved from the reference image." |
The reviewer checks the model, and for each garment the fit, the colours, the length and the details, plus whether the photo matches the brief. Each check cost 1 credit. It is toggleable per run; the first take of look 1 was re-shot without it because the problem, no shoes, was in the brief rather than in the result. The mechanism at batch scale is on the QA and retries page.
How do you run it across hundreds of SKUs?
From the assistant you already use, through the MCP server
Connect the Uwear MCP server to ChatGPT, Claude, Claude Code or Codex and ask for the run in plain language. The assistant resolves your saved model and art direction by name, proposes a costed brief in credits, and runs it when you approve. The system template Product page set makes the front photo, the upper-body edit, the back edit and a five-second turn for every garment in the run. A Shopify store can pair it with Shopify's own MCP so the assistant reads the products and writes the photos back. The series on this page was briefed this way.
Prompts that keep a range consistent from chat
Copy one into an assistant connected to the Uwear MCP server. Each becomes a costed brief you approve before anything generates.
Shoot a whole drop on one saved model
“Shoot every garment tagged drop-42 on our saved model Giulia in the Urban Brick Editorial art direction, full body front, plain white sneakers, and show me the costed brief.”
Turn the reviewer on for the run
“Run the same brief with QA on and one retry allowed, then list every rejected take with its reason.”
Complete the product-page set from the approved photos
“For every approved front photo from that run, make an upper-body edit and a back edit with the Product page set template.”
From your own systems, through an automation or the REST API
When the range grows every week, wire the saved shoot to a trigger. A Production Automation shoots each garment on the saved model in the saved art direction as it is added, runs the reviewer, and tags the keepers. The REST API submits the same command from your own pipeline with a webhook on completion. One real automated run, with its cost, is in how fashion brands scale AI product photography without a studio.
By hand, as a team, in Studio
Studio runs the same shoot from one panel, and Batch Workflows run it for a whole season at once. Studio, the MCP and the API share the same saved model, art direction and library, so a team can start by hand and hand the repeat work to the assistant or the automation later without re-saving anything.
What numbers can you plan a range with?
| Credits per full-body photo | 5 on Gemini Pro at 2K. Price depends on the AI model selected; rates are on the models page. |
|---|---|
| Time per photo | About 90 seconds from brief to stored result in these runs. |
| Credits per reviewer check | 1 per result. |
| Takes rejected in this series | 2 of the first 3, both fixed on the first retry. |
| People needed after the assets are saved | 0 for the run; 1 to approve the costed brief. |
Uwear is priced in credits, and the estimate for a run, including the worst case if the reviewer retries the full allowance, is shown before you approve it. Current rates for every model are on the models page.
Frequently asked questions
Do I need to write a new prompt for every garment to keep product photos consistent?
No. On Uwear the look lives in a saved art direction, and the person lives in a saved model. A garment run only needs the garment photo and a short shot intent such as the pose or how the top is tucked. The three looks on this page were each one sentence long; the brick street, the light and the model came from the saved assets.
Can I keep the same model and change the setting for each collection?
Yes. The model and the art direction are separate saved assets. Keep the model and switch the art direction for a new collection, or keep the art direction and switch the model for a second size or a second face. Either way, everything you did not switch carries from the same saved reference into every generation, and the reviewer flags a take where it drifts.
What happens when the reviewer rejects a product photo?
The verdict and the reason are written on the result, and a retry runs within the allowance you set for the run. On this page the reviewer rejected two takes, one because the person did not match the saved model and one because a knee-length skirt was rendered ankle-length; both retries were approved. The reviewer is toggleable and costs one credit per result checked.
How do I get a consistent back view and detail crop for every garment?
Make them as camera edits of the approved front photo rather than as new generations. A camera edit reframes the approved photo to an upper-body, a back or a detail view, so the model, the set and the light are the same ones the front was approved with. The Product page set template does this for every garment in a run.
Save your model and art direction once, then run the range
Create the saved model, write or dictate the art direction, and brief the first drop from your assistant. Every garment after that reuses the same three assets.